Saturday, April 14, 2012

April's Funky Chicken

April

April-close up
With April's Funky Chicken block from Fat Cat Patterns, I'm getting braver with the stitches.  So many to choose from!  Some work well, others not so well...as in the one going around the body.  Too much space between the fancy zigs and zags, so I quickly switched my Bernina 830 to sewing mode and chose stitch #11 - a utility stretch stitch and popped on the #20 Open Toe foot.  This stitch looked most like a stem stitch.  I widened it just a bit and covered the raw edges, switched back to embroidery mode and stitched the decorative stitch again.  Perfect!!!

This time I used quilting cotton for the decorative stitches.  A heavier thread, but even so, there were some that I stitched twice to beef it up.  Using quilting cotton added an additional thread change, as I used matching embroidery thread for placement and tackdown stitches, but the end result, I think, is worth it.

Friday, April 13, 2012

HST Quilt - Pinwheels is a favorite block!

April's Pinwheels
Our HST block this month from In Color Order is the old stand-by of pinwheels.  I love this block.  It's simply a happy block!  My points came out really good on this block.  Only one center area was a bit off and all I needed to do was sew right next to the original stitching line and remove a few stitches.  One of these days, I'll get a whole block sewn together with no frog stitching!!  Maybe.....

Wednesday, April 11, 2012

FMQ Challenge - creating quilt stencils

Our FMQ expert this month is Don Linn.  With this lesson, he shared how he makes his own stencils, then transfers them onto the fabric prior to quilting.  A very interesting lesson which requires 2 tracings for each motif.  One on netting, the other onto the fabric.  He supplied us with one stencil and I decided to try my hand at other designs found in a Dover Coloring Book, "Geometrix", and a book, "Freehand Filler Patterns" by Sue Patten.

I used a blue water soluble marking pen to trace onto the fabric as Mr. Linn directed in his lesson.  I really hate these pens!  LOL  It always takes me several wettings to get the marks to stay gone. I've posted photos of my FMQing showing my quilting over the marks and after the marks have been removed.  All quilting uses a variegated brown to cream quilting thread.

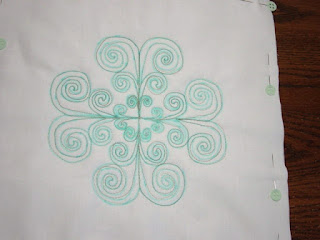
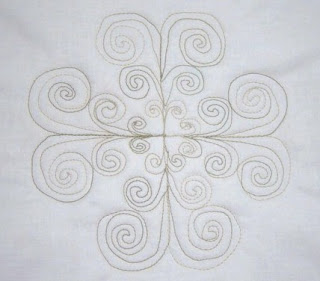
Here is the motif from Mr. Linn


Here's the motif from Dover.  I thought this would be fairly easy...just scallops.  Wasn't as easy as I thought as you can see once the marks were removed!


Here's the motifs from the "Freehand Filler Patterns" book.  Again, I thought an easy one!  Not too smooth going around those curves.


Believe it or not, the one that I thought would be the hardest, turned out to be the easiest for me.  Who knew?????


These were fun and interesting to do.  Opens up a whole new world of quilt motif ideas!  I stayed on the lines pretty well, and was surprised that I could keep a line straight and even back track over it very well.  Much more practiced needed, but I'm gaining so much confidence and experience.  And having fun....that's the important thing!!

Keep on stitchin'!!


Sunday, April 8, 2012

Perfect Points - last blocks - LeMoyne Star

Lesson 5-LeMoyne Star
The last 2 blocks in the Perfect Points Quilt along, both LeMoyne Star.  I paper pieced these blocks using EQ7 to print the templates as I did for the Basket Block.  These blocks were much easier than the basket.  Larger pieces to work with.  I'm very pleased with the final product using paper piecing, but I found it to be hard for me to think backwards!  I kept shorting a side or corner...which I did frequently until I started cutting the twice-as-large-as-I-need pieces!  The paper came off easily as I used short stitches...oh, I used plain ol' copy paper to print the templates.  I was reminded of tearing away the stabilizer from embroidery projects....a necessary 'to-do' after you thought you were finished! LOL

Once I get the quilt assembled and completely finished...including quilting...I'll post a photo.

Saturday, April 7, 2012

Perfect Points - Paper Piecing


Lesson 5 - Basket
Well this is a horrid picture, but it's the best I could get.  Black is so hard to photograph!  We are almost done with the blocks for the Perfect Points quilt along at Connecting Threads.  I have 2 more to go after this one and they are both the same - the LeMoyne Star, also paper pieced.  This is the basket block and it was done by paper piecing.  I used my EQ7 to print the templates.  Worked very well....until I sewed them together.  Got the whole block sewn together and then I realized it didn't look right.  I'd sewn the basket bottom to the sides of the basket!!  Big DUH!!!  More frog stitching....sigh.   Not too happy with the top square in the basket.  It shows up better than in the picture, but I probably should have deviated from the fabric legend and chose another.

Busy week for me next week, so may not get as far along with my BOMs as I wish.

Keep on stitchin'!!

Wednesday, April 4, 2012

The Challenge Hexagon Block

April Block 2
I'm going to be seeing hexagons in my sleep tonight!  There are 25 of these little 3/4" boogers!!  The large one is a 2" hexagon.  I put 5 of the small ones together and arranged 5 groups of them swirled around the large center one.  Ya think I just magically designed this?  Nope, I used my Bernina Embroidery Software!  After I got what I thought was a pleasing group of 5, I used the wreath tool to get the look I liked.  Yep, took me several tries and undos, but so much easier than moving the little things around by hand, don't you think?

I have decided I'm not that fond of English Paper Piecing and hexagons.  Love the look but a bit too fiddly for me.  Again, no hand sewing for me, all is stitched with monofilament thread on my machine.  But I learned a new technique and that's good!

She said 'Hand Sew'??? Uh, I don't think so!!

April Block1
Craftsy's BOMs this month are hexagons made using English Paper Piecing.  New technique for me.  Amy said to hand sew the hexagons together.  HA!  I say, HA!!  I thought I would use monofilament thread and a narrow zigzag stitch.  Worked like a charm.  The hexagons in this simple block are 1 1/4" size.  This measurement is taken from one of the straight outer edges, not across from point to point.  I didn't know that's how hexagons were measured...another new fact for me.  I sewed 2 rows of the pieces end to end, then snugged them into place side by side and zig zagged my way down.  I then used a small invisible applique stitch and sewed them to the base block.  Not a single hand sewing needle ever came close to my fingers!!!

Amy's block 2 is a corner sun-looking hexagon arrangement which she calls Sunny with a Chance of Hex.  She issued a challenge to create our own hexagon block if we didn't care for hers.  I didn't care for hers, so I'll be taking her up on the challenge.  Fingers crossed my challenge block will turn out ok!